Codelab 2: AWS + S3
Changelog
September 16th, 2017
Fixed STICs upload method, based on Content-Type issue.
Added note about boto3 requirement for assignment.
Added note about
git pull/ newVagrantfile- Updated CloudTrail log submission section.
September 14th, 2017
- Released Codelab 2 🎉.
Due Date
This codelab is due on Friday, September 22th at 11:59:59PM.
Going forward, you all will always be given a full week to complete each codelab, which will guarantee that you will be able to bring any questions to either the next class or one of the two office hours sessions.
Goal
In this codelab, you'll get to play around with S3.
- You'll get up and running on AWS with a Free Tier account and AWS Educate.
- You'll test out S3 from the AWS CLI
Setting Up
Before starting this codelab, run git pull in the 389Lfall17 directory to update your local copy of the class repository.
This will pull in an updated Vagrantfile which you will use to launch the Vagrant box for this codelab.
Getting Started with AWS
The first step is going to be to get an AWS account. If you already have an Amazon.com account with your umd.edu email, then you can go ahead and sign in with the same account. Sign in or Sign up here.
Free Tier Accounts
You'll be using a Free Tier account on AWS. This tier is meant to give developers like you access to AWS to test drive some of its features.
You can learn more about the specifics of what is available on this page.
AWS Educate via MLH
Now that you have signed up for an AWS account, register for AWS Educate here. As university students, you can get access through MLH's partnership with AWS Educate.
You'll need your Account Id during the sign-up process, which you can access from the "My Account" page on AWS.
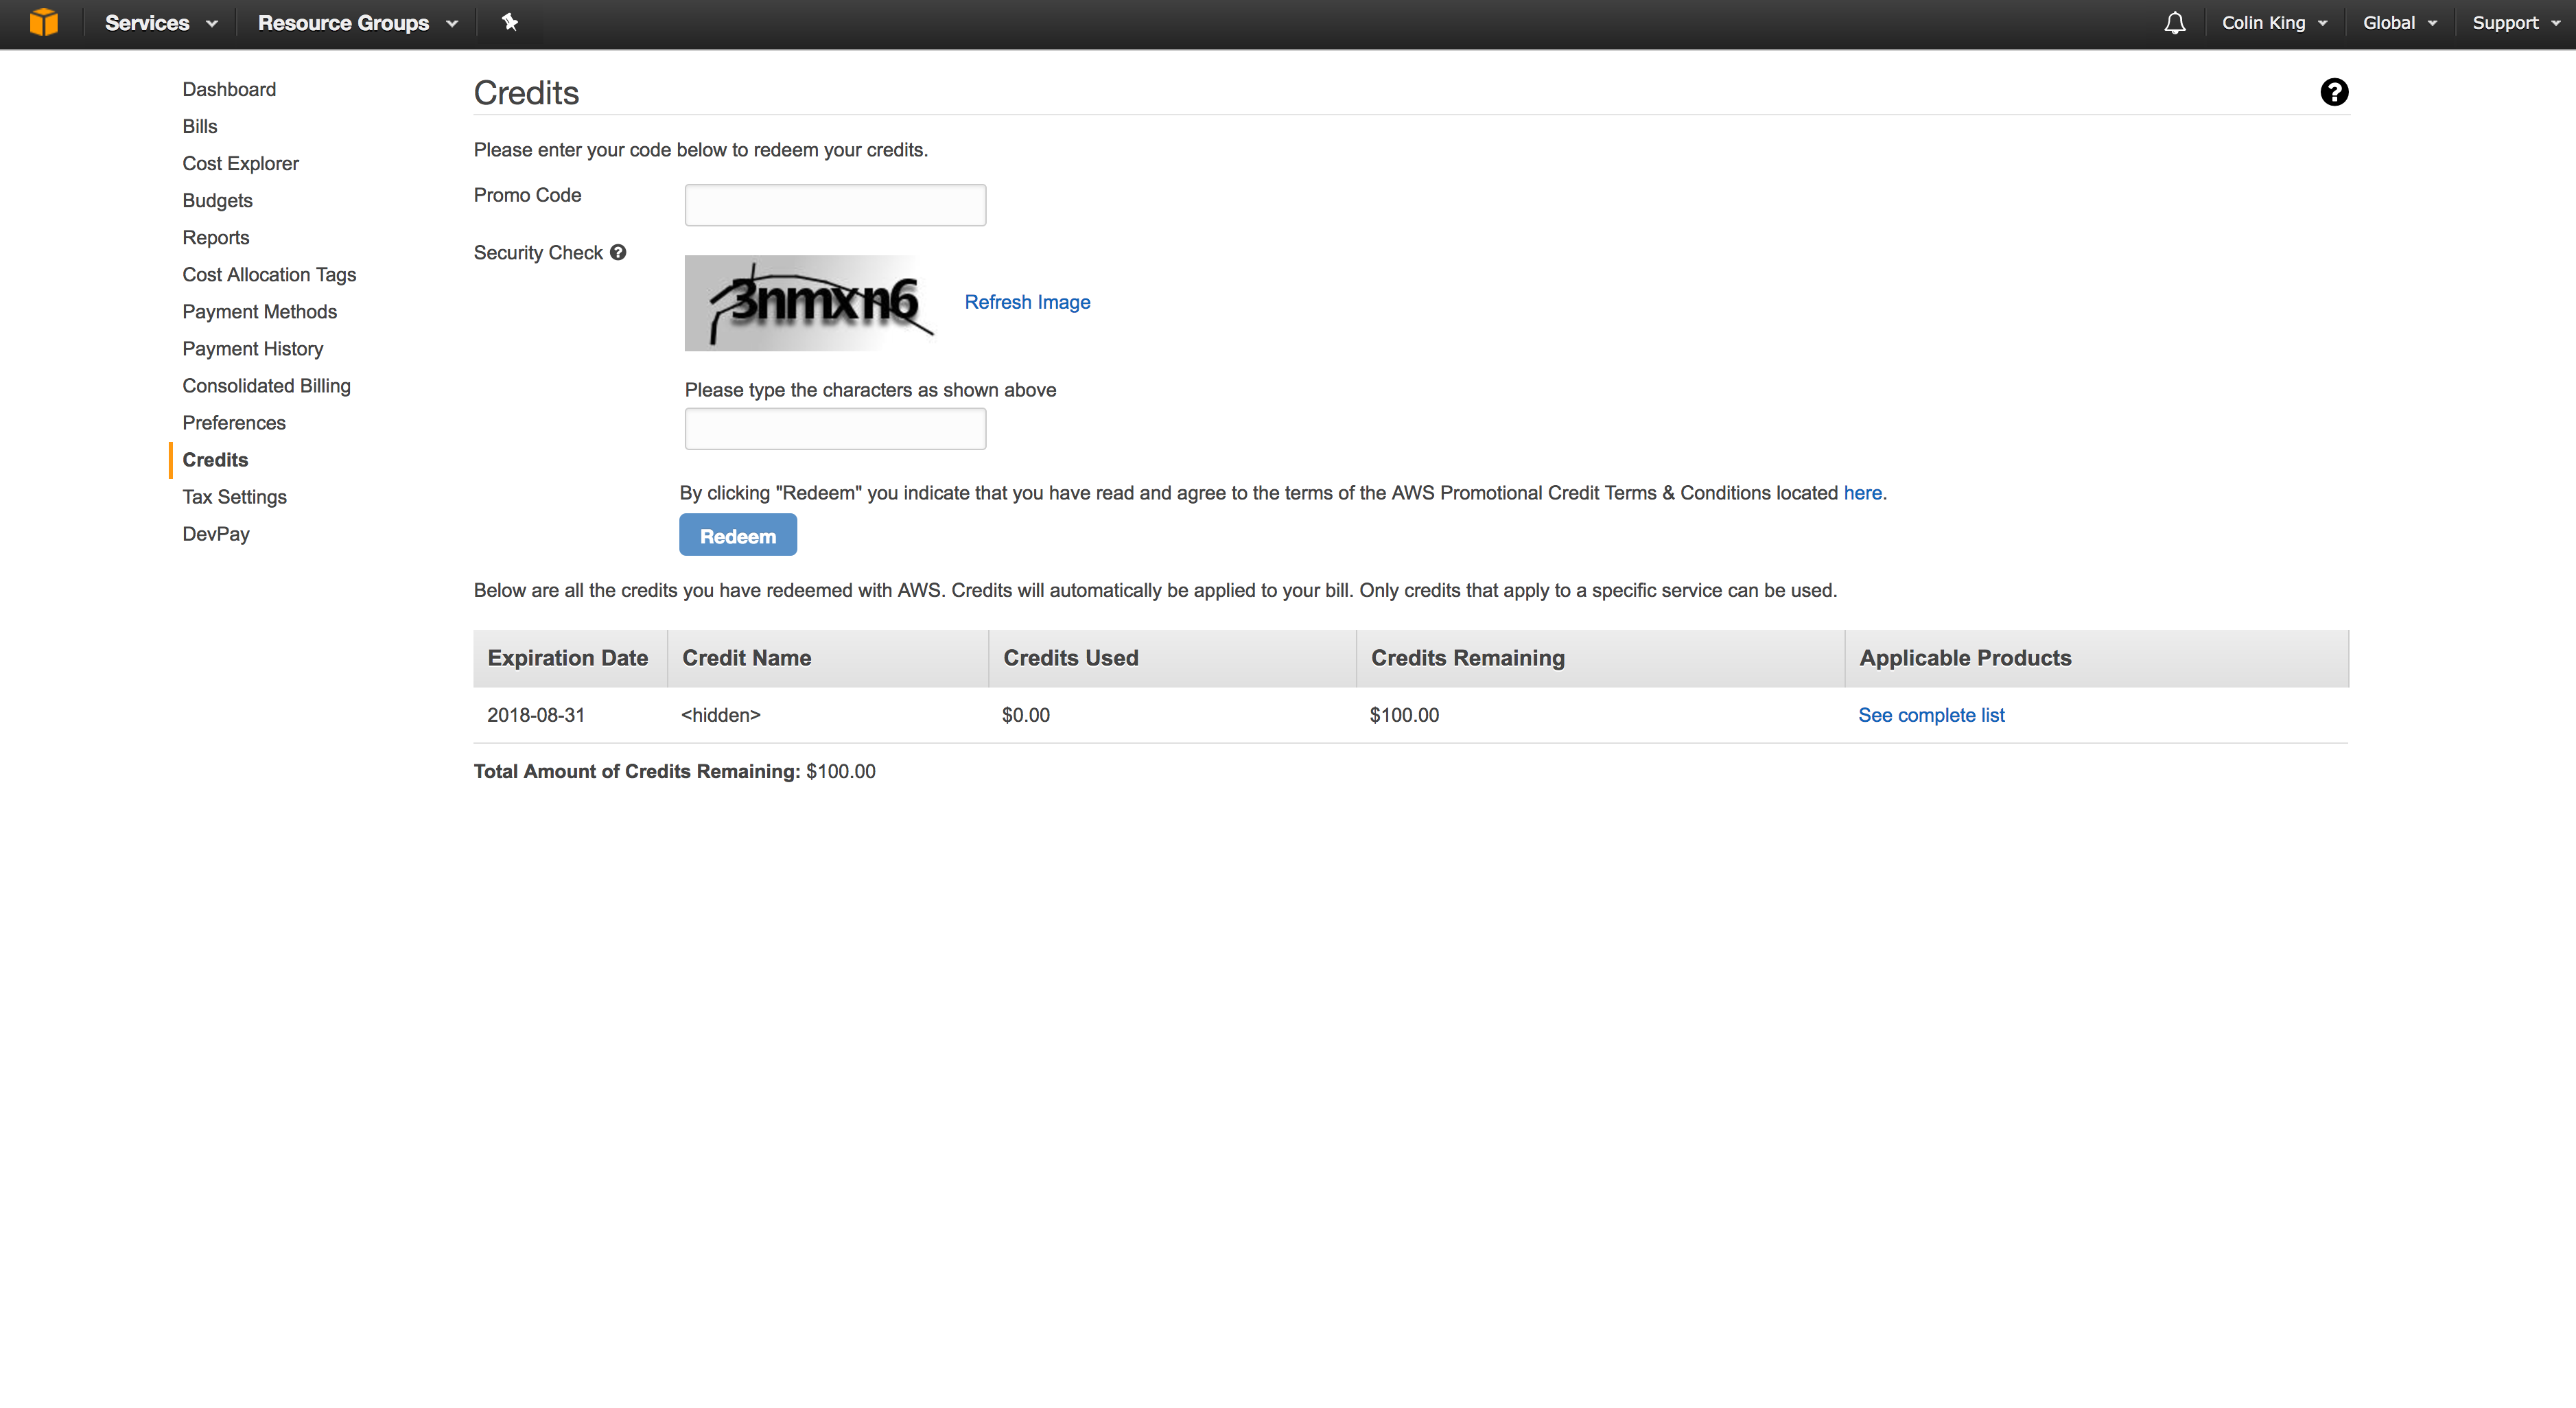
After you complete this process, you will receive a promotional credit via email. You should redeem this in the Billing > Credits section via AWS's GUI.

AWS GUI
This class is going to mostly stick to the CLI, rather than the GUI (referred to as the AWS Management Console, or just the AWS console). However, take the time to become familiar with it as we go, as it can be a good tool to verify that things are working as you expect.
The two keys components to understand here are how to access different services, and how to change between regions.
You can see the full list of services from the "Services" dropdown in the top-left corner:

You can also use either search bar to locate services.
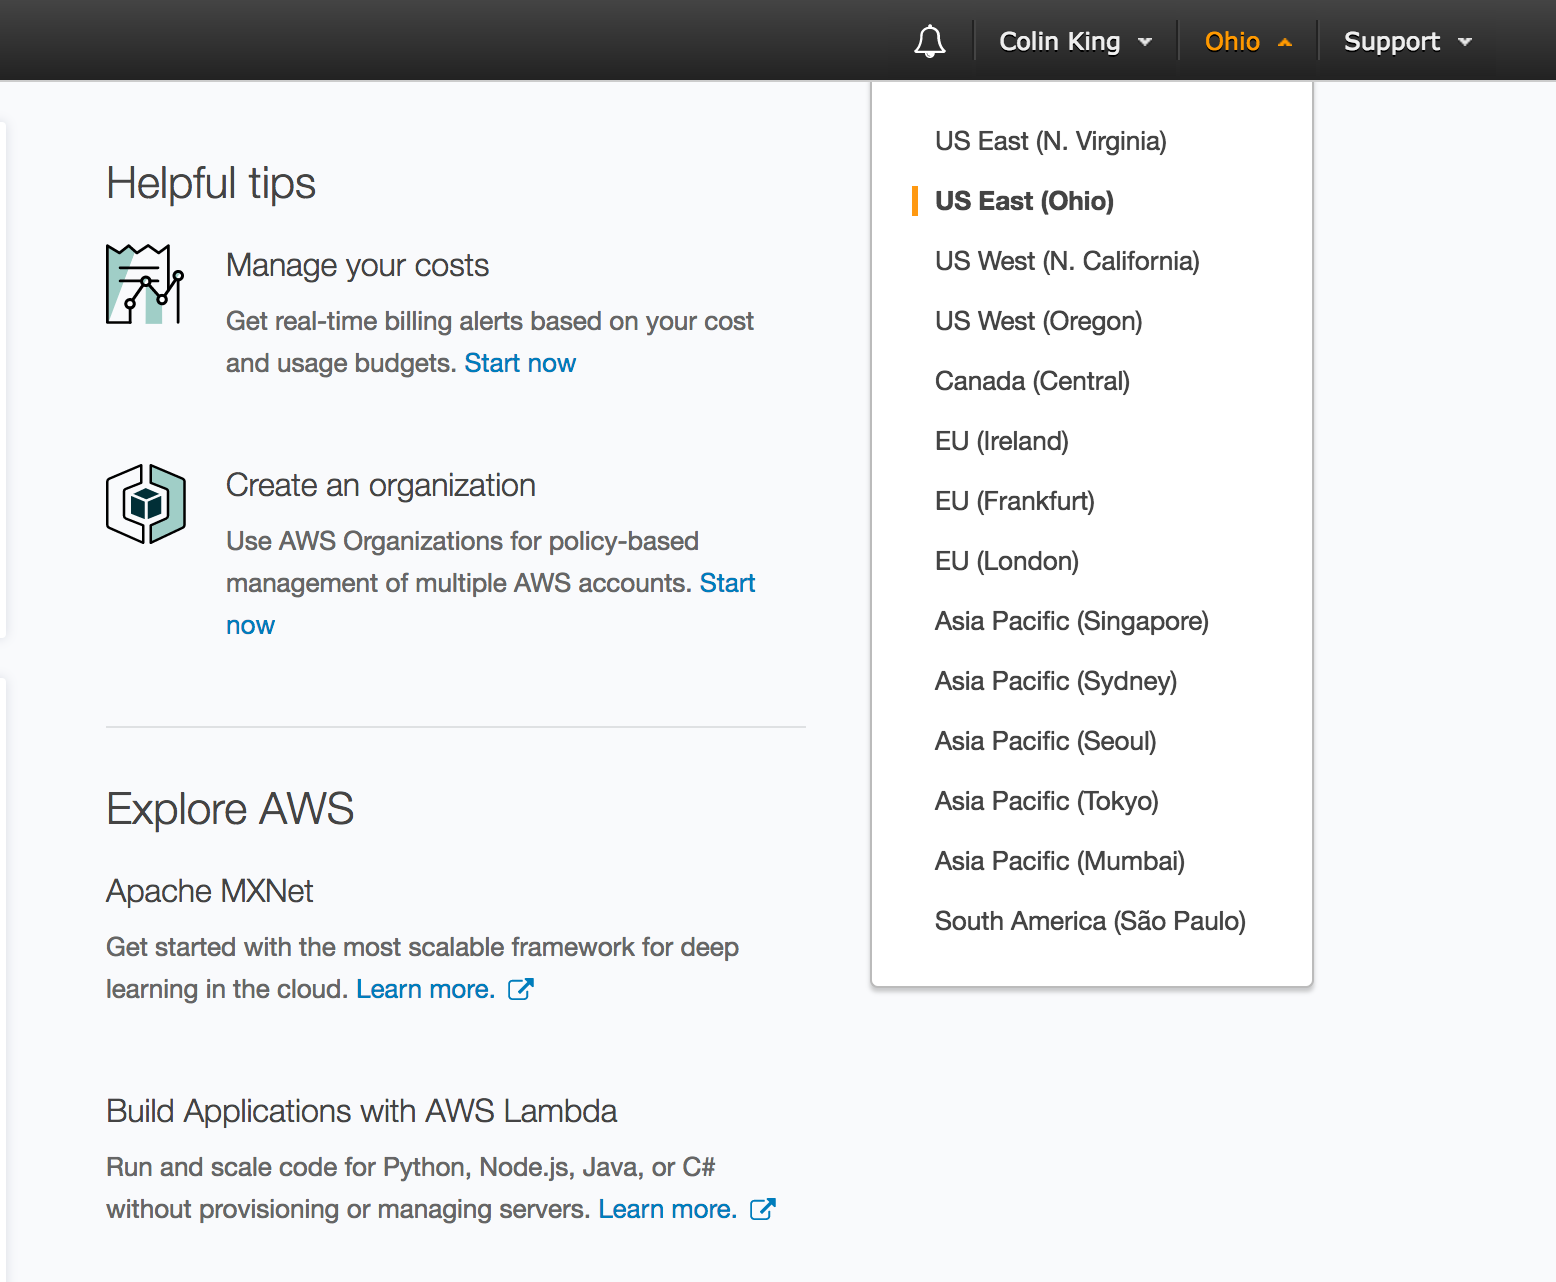
To see which region you are currently in, look for the region tab in the top-right corner:

Keep in mind that we will be using us-east-1, which is in North Virginia.
As mentioned above, we will be using S3 in this codelab, so I would recommend that you go ahead and take a peek at S3 via the AWS Console. Come back throughout the codelab and look at how things change as you create buckets, upload files, etc.

AWS CLI
IAM User
To work with the CLI, you'll need to first create an IAM user via the AWS Console. Open the "IAM" service and navigate to "Users" (tab on left) > "Add user".
Pick a name for your user, and check "Programmatic Access". You won't need to sign in to the AWS console with your user.

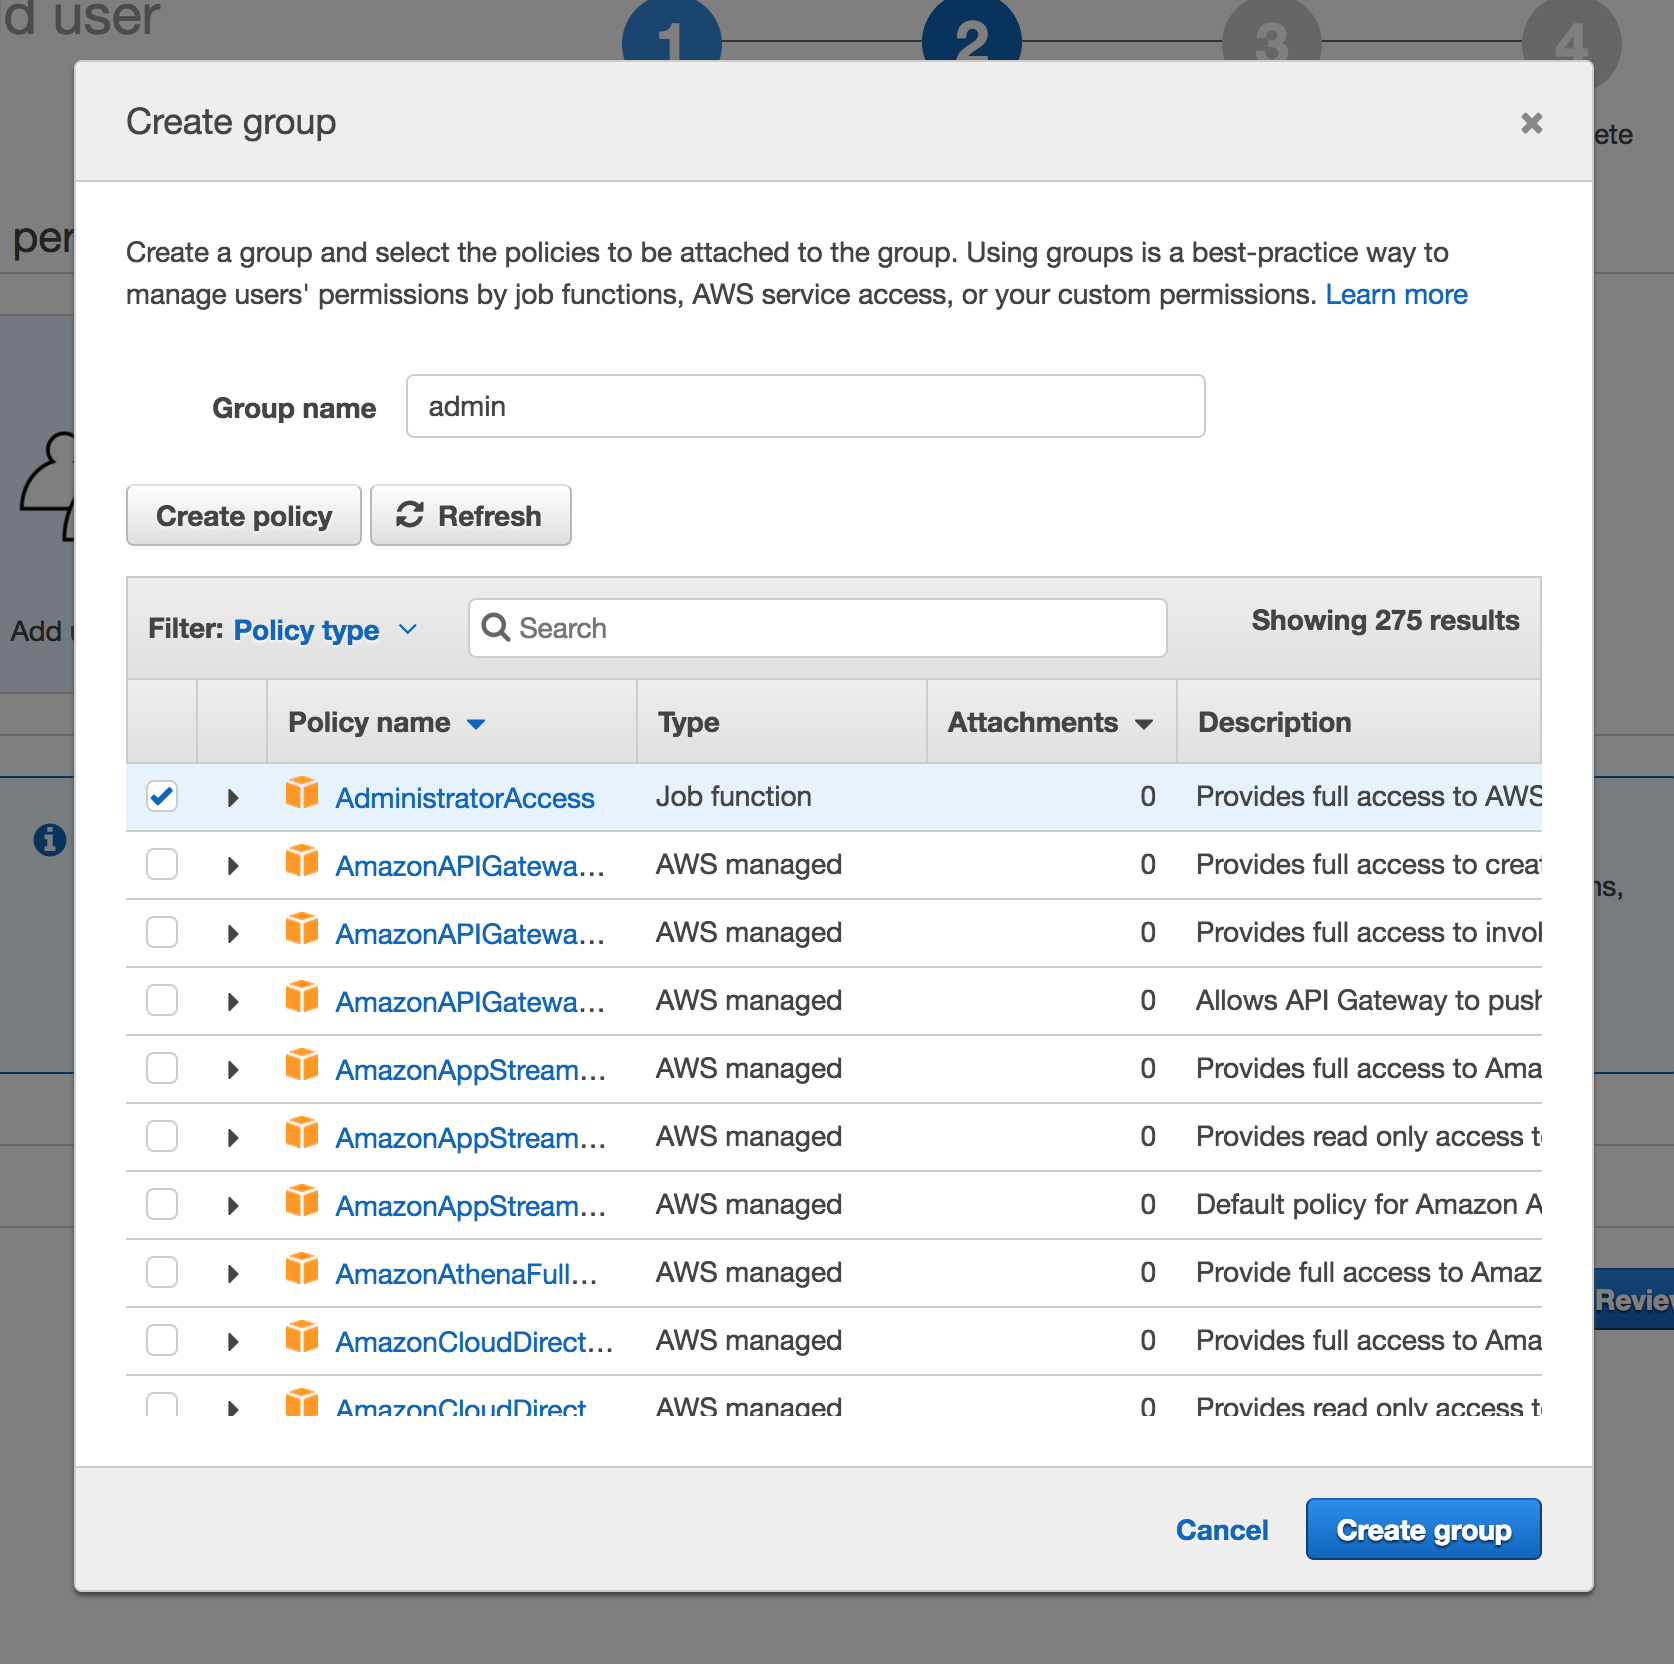
You need to specify what permissions your new user has. To do this, we will create an IAM group for admin users. Give this group a name and select the "AdministratorAccess" policy.

Click through to the "Complete" page where AWS will provide you with the access key ID and secret access key. Keep the latter safe, because AWS will not show it to you again. You will need to save these values to the file
aws.credentialsin the root directory of this repo. You should useaws.credentials.exampleas a template, just make sure to rename it. This credentials file will be copied into the~/.awsdirectory in your Vagrant box, where AWS tools will look for it.
Testing the CLI
Let's verify that everything has been properly configured. Launch the Vagrant box for this codelab (see: lectures/lecture-02/codelab). Remember that you need to run vagrant up to launch it, and then vagrant ssh to open a shell inside the box.
Note: During the provisioning step for this Vagrant box, it will copy over your AWS environment variables from aws.credentials. If you forgot to set these values before running vagrant up, then simply run vagrant provision --provision-with aws_env to re-run the provisioner that copies over your credentials.
Verify that your user is listed when you run the following command:
$ aws iam list-access-keys
{
    "AccessKeyMetadata": [
        {
            "UserName": "colin-cli",
            "AccessKeyId": "AKIAIJZZNGNWXFIUAS2Q",
            "Status": "Active",
            "CreateDate": "2017-09-12T05:47:05Z"
        }
    ]
}
If your access key isn't there, then run cat ~/aws.env and double-check that your access keys copied over from your host environment.
Otherwise, you are good to go. We'll use the CLI more below.
Root User
To clarify the difference between the user you have been using to log in to the AWS Console and the IAM user you just created:
The credentials you've been using to log in with are the root user credentials. Normally, you avoid using the root account and instead federate access out to IAM users so that you can audit their usage. However, in this class, we will continue to use the root account for simplicity.
Essentially, you have two users for your account: the root user, which you use to access the AWS console, and the IAM user, which you use to programmatically access AWS. You won't need to think about this now that your AWS environment is configured, but it is good to know.
S3 Basics
There are two main ways that you will programmatically interact with AWS. The first is through the CLI and the second is through the boto3 SDK. The CLI is great for one-time changes to your AWS environment. However, if you want to create dynamic scripts, then you will want to use something else -- in this class, that will be Python with Amazon's Python SDK, boto3.
For codelabs, I'll be showing you how to interact with AWS via the CLI, since the CLI is easier to experiment with compared to Python code. I won't go into as much detail with the boto3 library, since I don't believe that explaining both adds much value. The APIs for both are fairly similar, so you should be able to easily pick up the relevant boto3 as long as you understand each codelab.
Feel free to ask on Piazza if you have any trouble or questions about boto3 APIs.
References
You want to reference the aws s3api documentation while working through this codelab.
Basic Operations
From this point forward, we will be working exclusively inside of the Vagrant box.
CLI Overview
The aws cli exposes commands for almost every service in the form of:
$ aws [service] [subcommand]
The full list of services is available via tab-completion.
To get help on a command, append the word "help". For example:
$ aws help
...
$ aws s3api help
...
Buckets
Creating a Bucket
Lets start by working with S3 buckets.
The s3api create-bucket command allows you to create S3 buckets from the CLI. Go ahead and create a bucket to use in this codelab:
$ aws s3api create-bucket --bucket cmsc389l-<your directory id>
Remember that these names must be globally unique. What happens if you try to create a bucket that has already been claimed? Try it against the cmsc389l bucket that I created for class:
$ aws s3api create-bucket --bucket cmsc389l
Audit Trail
Throughout the rest of the codelab, you will be playing around with the bucket you just created. For me to grade this codelab, I ask that you enable CloudTrail auditing on this bucket. CloudTrail is a tool that allows you to perform audit logging on different services, which can be useful for debugging problems or for enabling compliance.
For this codelab, you'll submit the audit trail at the end of the assignment. I'm not going to look at the logs in depth, I'll only be skimming to verify that you took the time to go through this codelab. So feel free to explore beyond the walkthrough below.
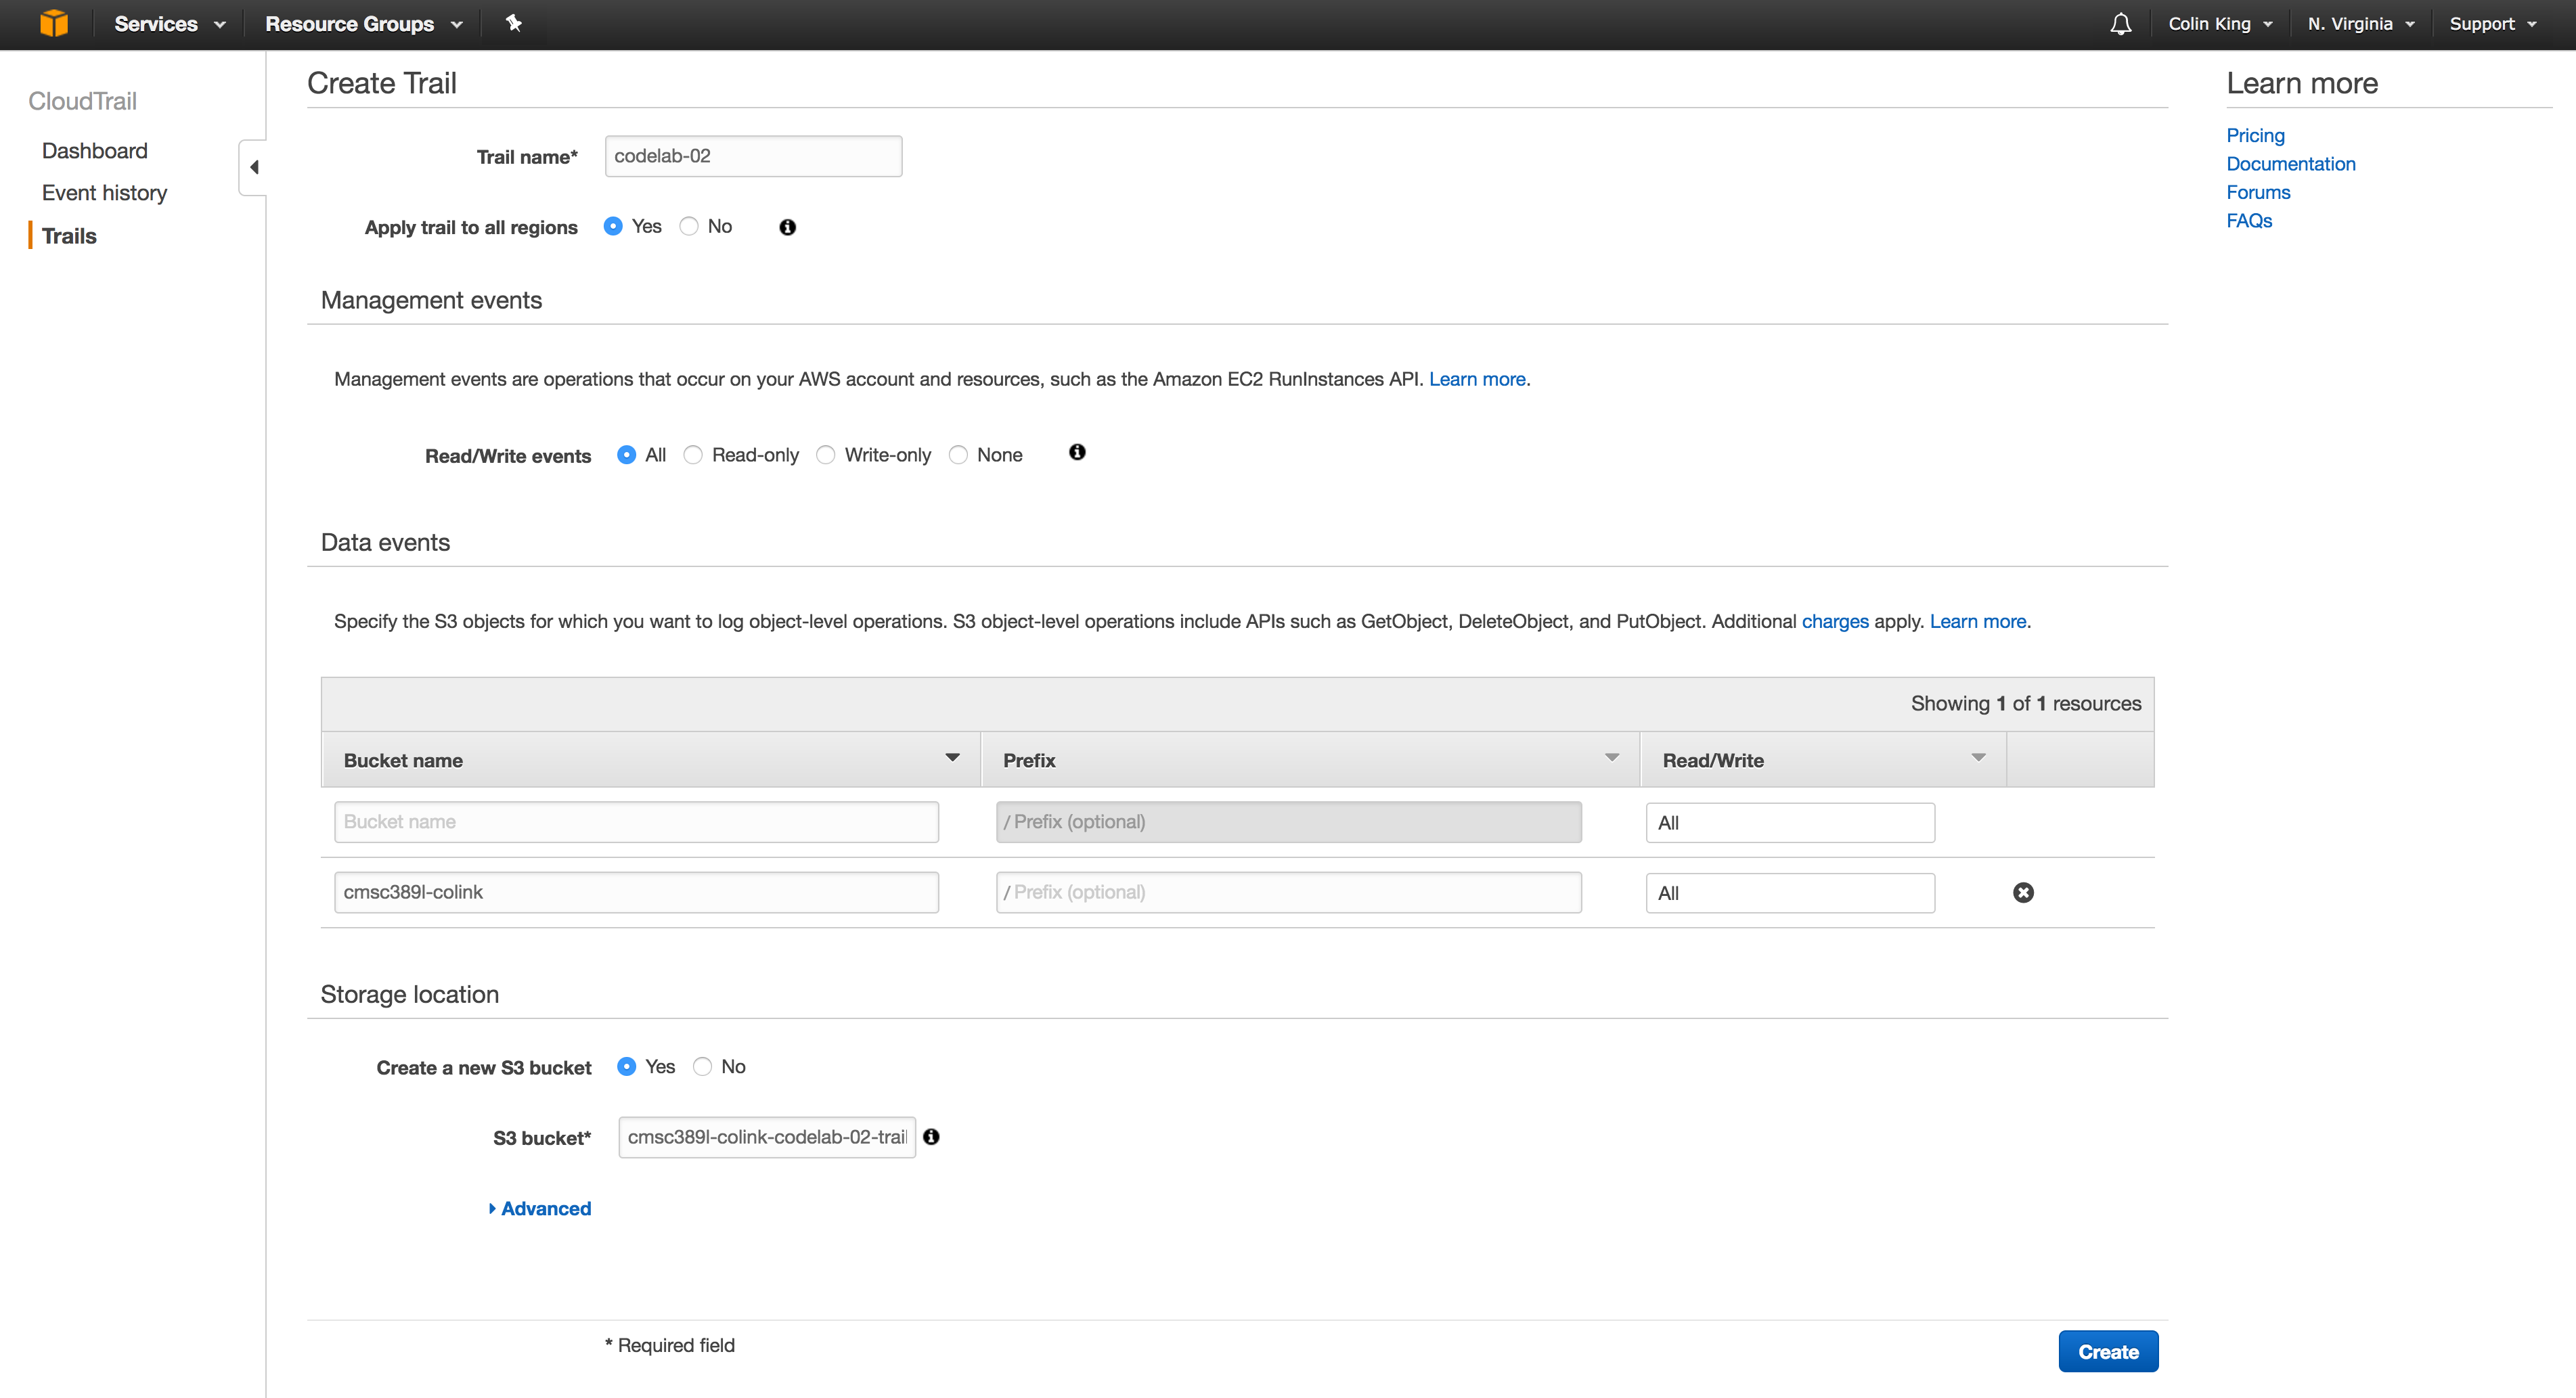
We will enable the audit log via the AWS Console. Open the CloudTrail service and go to "Trails" > "Create Trail". Create a new trail on the bucket you just created (cmsc389l-<directory id>) and save it into a newly created bucket.

The new trail will take a few seconds to appear in the CloudTrail list, but once it does, you are good to go with the remainder of the codelab.
Important: You must enable the audit logging before continuing.
Listing Buckets
To check which buckets are owned by your account, use s3api list-buckets:
$ aws s3api list-buckets
You should see both buckets -- the first bucket you created, and the one containing audit logs.
Writing Data
Now that we have an S3 bucket, we are ready to upload content into it.
Let's create a file to upload:
$ echo "Hello World\!" > hello_world.txt
$ ll
total 4.0K
drwxr-xr-x 1 vagrant vagrant 68 Sep 12 07:28 code
-rw-rw-r-- 1 vagrant vagrant 13 Sep 12 13:41 hello_world.txt
Upload it into your bucket with the s3api put-object command. As mentioned in class, notice how you need to specify the bucket and key, which will map to this object.
$ aws s3api put-object --bucket cmsc389l-colink --key hello_world.txt --body hello_world.txt
You can think of this as a hash table where together the bucket and key uniquely identify an object:
{
    (bucket1, key1): object,
    (bucket1, key2): object,
    (bucket2, key1): object,
}
Listing Objects
To verify that the file was uploaded into the bucket, use the s3api list-objects-v2 command:
$ aws s3api list-objects-v2 --bucket cmsc389l-colink
Create and upload another file into this bucket with a different key. Now, you can use the --prefix flag of the list-objects-v2 command to filter which objects to list.
Directories
This becomes particularly useful with directories. Let's create a simple directory structure locally:
$ mkdir dir1 && mkdir dir2
$ echo "Directory 1" > dir1/file.txt
$ echo "Directory 2" > dir2/file.txt
$ tree
.
├── dir1
│   └── file.txt
└── dir2
    └── file.txt

2 directories, 2 files
Upload both of these files:
$ aws s3api put-object --bucket cmsc389l-colink --key "dir1/file.txt" --body dir1/file.txt
$ aws s3api put-object --bucket cmsc389l-colink --key "dir2/file.txt" --body dir2/file.txt
Run the list-objects-v2 command again, and you will see all of these files. However, if you wanted to see only the files in one of these directories, you could limit the list operation to those keys with a given prefix:
$ aws s3api list-objects-v2 --bucket cmsc389l-colink --prefix dir1
This effectively recreates a recursive ls operation (ls -R [<prefix>]).
Reading Objects
Let's inspect the contents of that "Hello World" file that we uploaded.
To read the contents of an object, use the s3api get-object command. This will stream the contents of the file from S3 into a local file.
$ aws s3api get-object --bucket cmsc389l-colink --key hello_world.txt out.txt
$ cat out.txt
Hello World!
🙌
Deleting Objects
Finally, if you want to delete an object, there is the s3api delete-object command.
$ aws s3api delete-object --bucket cmsc389l-colink --key hello_world.txt
We can verify that the file was removed correctly by attempting to read this data back:
$ aws s3api get-object --bucket cmsc389l-colink --key hello_world.txt out.txt
As you see, you'll get a NoSuchKey exception.
Wrapping Up
Great, you should now be familiar with the basic operations on S3. You can programmatically create buckets, upload objects, read back data from objects, list keys in a bucket, and delete these objects by key.
Storage Types
In class, we talked about four storage classes: Default, Reduced Redundancy Storage (RRS), Infrequently Accessed (IA), and Glacier. We're not going to cover Glacier here, since it's API is fairly complicated. However, let's experiment with moving objects between the other three storage types.
We can toggle between the first three storage classes of an S3 object using the --storage-class flag for the s3api put-object command. Note that moving to Glacier is a separate process. Why? Objects in the first three classes are all accessible in real-time, while objects in Glacier are not.
For this process, let's re-upload a file into our bucket:
$ aws s3api put-object --bucket cmsc389l-colink --key hello_world.txt --body hello_world.txt
Configuring RRS or IA
Before we change the storage class, we can inspect the contents of the file we just uploaded to determine what storage class it is held in.
$ aws s3api list-objects --bucket cmsc389l-colink --prefix hello_world.txt
There are two ways to modify the storage class. The first involves overwriting the object already in S3 with a new object which has a different storage class set:
$ aws s3api put-object --bucket cmsc389l-colink --key hello_world.txt --storage-class REDUCED_REDUNDANCY
Perform the s3api list-objects command again to double-check that it modified the storage class.
The second is that we can use the s3api copy-object command to avoid the extra bandwidth charges that arise from uploading the object all over again. In this case, it will only change the storage class on the object.
$ aws s3api copy-object --bucket cmsc389l-colink --copy-source cmsc389l-colink/hello_world.txt --key hello_world.txt --storage-class STANDARD_IA
If you perform one last s3api list-objects command, you'll see that it changed the storage class again.
Remember that each of these modes still provide real-time access to these objects, so we can read them and get them back quickly:
$ time aws s3api get-object --bucket cmsc389l-colink --key hello_world.txt out.txt
...
aws s3api get-object --bucket cmsc389l-colink --key hello_world.txt out.txt  0.29s user 0.05s system 41% cpu 0.817 total
Instead, if you were to move these files into Glacier, then you would need to trigger a transfer job which would move files back into an S3 bucket. This process will usually take hours.
S3 CLI
The tool that you've used so far, aws s3api, is one of two AWS CLI tools for interacting with S3. The other, aws s3, is a higher-level wrapper on top of s3api that provides typical directory traversal operations.
For example, you can ls a directory on S3:
$ aws s3 ls s3://cmsc389l-colink
                           PRE dir1/
                           PRE dir2/
2017-09-13 11:44:17         13 hello_world.txt
2017-09-13 12:24:14   25165824 output.dat
It provides a number of operations:
cp ls mb mv presign rb rm sync website
I recommend that you play around with this tool a bit more to see how it compares with s3api. As you will see, it is much more limited than s3api, but it is quite useful for when you need to move files between your local computer and an S3 bucket.
Assignment
Your assignment for this codelab is to re-create part of the s3 sync command using boto3 in Python. You'll be able to use this script to quickly copy files and directories into S3.
Note: You must use boto3, not the s3 sync command. You will not get full credit if you just write a wrapper on top of the sync command.
As an example of how this script works, say you had a directory like so:
a.txt
folder1/
    b.txt
    c.txt
folder2/
    folder3/
        d.txt
Then here are a few examples of the resulting state in S3:
Example 1
$ python upload.py a.txt --bucket cmsc389l-colink
a.txt
Example 2
$ python upload.py a.txt --bucket cmsc389l-colink --destination z.txt
z.txt
Example 3
$ python upload.py . --bucket cmsc389l-colink
a.txt
folder1/b.txt
folder1/c.txt
folder2/folder3/d.txt
Example 4
$ python upload.py folder1 --bucket cmsc389l-colink --destination uploads
uploads/b.txt
uploads/c.txt
The upload.py file in the code/ directory includes some boilerplate to get you started.
Like the previous codelab, you only need to pass the public tests to get full credit.
To run the tests, you will need to install a few dependencies:
$ pip install -R requirements.txt
Then, the tests can be run like so:
$ python test.py
Note that if you kill the testing program, it won't clean up after itself. If you end up with extra testing buckets, you can quickly remove them with the following command:
$ aws s3 ls | grep "test-bucket" | cut -f3 -d ' ' | xargs -I {} aws s3 rb 's3://{}'
Feel free to install any packages you would like to use. Just make sure to add them to the requirements.txt file (run pip freeze > requirements.txt).
Host a Static Website
As mentioned in class, you can use S3 to host static content, like static websites. Let's do that for the STICs website!
Now that you've finished the assignment, you have a tool that you could use to upload static content for a website, however the tool does not set the Content-Type of each file when they are uploaded (they default to a byte stream type). If you tried to open an HTML file in your browser that was hosted on S3 with this Content-Type, then your browser would just download the file instead of serving it (it doesn't use the file ending to determine the type of file, as you might expect, it instead uses the Content-Type header in the response).
Therefore you have two options: 1) update your tool to detect and set the Content-Type header (use a library like python-magic). Otherwise, you can use the aws s3 sync command.
You will want to clone the source code from it's GitHub repository here: https://github.com/UMD-CS-STICs/UMD-CS-STICs.github.io
$ git clone https://github.com/UMD-CS-STICs/UMD-CS-STICs.github.io
Then, create a new bucket specifically for this site, such as cmsc389l-<directory id>-website. Then, enable website hosting from that bucket:
$ aws s3 website s3://cmsc389l-colink-website --index-document index.html
Option 1: upload.py
Assuming that your tool will properly set the Content-Type header, then you can copy the source code into the root directory of this new bucket using your tool:
$ python upload.py UMD-CS-STICs.github.io --bucket cmsc389l-colink-website --acl public-read
Option 2: s3 sync
If not, you can use the s3 sync tool instead. Make sure to sync the contents of the STICs site into the root of the bucket.
View the site!
To view the site, browse to the S3 URL of index.html and you will see the full STICs site!
https://s3.amazonaws.com/cmsc389l-colink-website/index.html
Submit a screenshot of the front page of the STICs site hosted on your S3. Make sure to include the URL in the screenshot (don't just submit a screenshot of sticsumd.com!).
Submission
You will submit a zipped directory containing your script, upload.py, plus an updated requirements.txt if you installed any packages. You will also include the screenshot of the STICs homepage and your audit log.
Audit logs are stored in as JSON files in a .gz zip archive in the bucket that you created. Within this bucket, these logs are organized in a directory hierarchy by date, region, and a few other factors (see this documentation page). You'll need to download all of your CloudTrail logs from this bucket for the us-east-1 region. You can use the aws s3 command to sync this directory to your local filesystem. You'll need to configure
$ # Command Format:
$ aws s3 sync s3://<cloudtrail bucket>/AWSLogs/<account number>/CloudTrail/us-east-1/<year>/<month> <local directory>
$ # Example:
$ aws s3 sync s3://cmsc389l-colink-codelab-02-trail/AWSLogs/800593953112/CloudTrail/us-east-1/2017/09 logs
In your submission, include the logs directory that you just downloaded.
Now that you have these log files locally, you can inspect their contents. To access a log, you'll need to unzip it with gunzip <log file name>.json.gz. Then, you can inspect the audit log with jq (a JSON pretty printer). Run cat <log file name>.json | jq . | less.
Submit this assignment to codelab2 on the submit server. Upload a zipped directory containing the following files:
<directory id>.zip
    upload.py
    requirements.txt
    logs/...
    stics.png